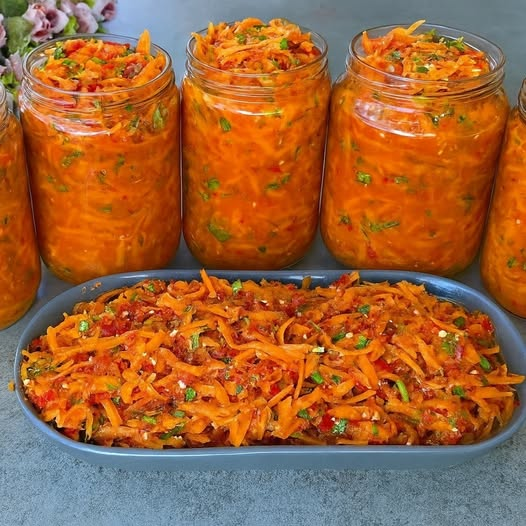
Why This Recipe is So Addictive
This isn’t just another preserve—it’s a raw, fermented powerhouse of flavor and nutrition. The natural fermentation process gives it a tangy, complex depth that cooked sauces can’t match, while keeping all the enzymes and probiotics intact. It’s the kind of condiment that makes even a simple piece of toast or grilled chicken taste extraordinary.
Gather Your Ingredients & Tools
Main Ingredients:
2.5 kg red bell peppers (about 10-12 large peppers)
20-25 red chili peppers (adjust for heat)
1 large head of garlic (about 10-12 cloves), peeled
3 kg carrots, peeled and roughly chopped
225 ml (1 cup) high-quality oil (sunflower or extra virgin olive oil)
100-150 ml apple cider vinegar or white wine vinegar (to taste)
3 tablespoons fine sea salt (non-iodized)
1-2 tablespoons sugar or honey (optional, to balance acidity)
You Will Also Need
see next page
Step-by-Step PreparationStep 1: Prepare the Vegetables
Wash and Dry: Thoroughly wash all peppers and carrots. Dry them completely.
Prep the Peppers: Wearing gloves, remove the stems and seeds from both the bell peppers and chili peppers. Roughly chop the bell peppers.
Prep the Carrots: Peel the carrots and chop them into chunks small enough to fit in your food processor feed tube.
Peel the Garlic: Separate and peel all the garlic cloves.
Step 2: Create the Base Mixture
In batches, pulse the red bell peppers, chili peppers, carrots, and garlic in a food processor until you achieve a uniform, coarse texture. Be careful not to over-process into a puree; you want some texture.
Traditional Method: If you have a meat grinder, use it for the most authentic texture.
Step 3: Season and Mix
Transfer the entire ground mixture to a large, non-reactive bowl (glass, ceramic, or stainless steel).
Add the salt and sugar/honey (if using). Mix very well with a wooden spoon or with gloved hands.
Let the mixture rest for 15-20 minutes. The salt will draw out moisture from the vegetables, creating a natural brine.
Step 4: Add the Final Ingredients
After resting, stir in the oil and vinegar. Mix thoroughly until everything is well combined.
Step 5: Jar and Ferment
Pack the mixture tightly into clean glass jars, leaving about 2-3 cm (1 inch) of headspace at the top.
Seal the jars tightly.
Label the jars with the date.
Let them ferment at room temperature for 1-3 days. You may see tiny bubbles forming—this is a good sign!
After the fermentation period, transfer the jars to the refrigerator. The flavor will continue to develop and mature over the next week.
You Will Also Need
see next page
Pro-Tips for Perfection
Heat Control: For a milder spread, use fewer chilies and remove all the seeds and white membranes. For extra heat, include some seeds or add a hotter pepper variety.
Taste and Adjust: Before jarring, taste the mixture. You can add more salt, vinegar, or a sweetener to suit your preference.
The Oil Layer: Some recipes call for a thin layer of oil on top to create an airlock. You can do this by pouring a tiny bit of extra oil over the packed mixture before sealing.
Storage: This spread will keep for several months in the refrigerator due to the natural preservation from salt, vinegar, and fermentation.
Serving Suggestions: How to Use Your Legendary Spread
The Classic: Spread generously on crusty bread or crackers.
The Upgrade: Use as a condiment for grilled meats, sausages, or fish.
The Dip: Mix a few spoonfuls into sour cream or Greek yogurt for an instant dip.
The Secret Weapon: Stir into stews, soups, or pasta sauces for a burst of flavor.
Enjoy the fruits of your labor! It’s no wonder everyone asks for the recipe. This is truly a jar of pure gold.

Fire-Roasted Pepper & Carrot Spread (The Jar Everyone Wants)
Advertisement