📄 Page 1: Overview, Ingredients & Preparation
🎄 Introduction: A Holiday Nostalgia Trip!
Get ready to create a show-stopping holiday treat that is as delightful to look at as it is to eat! This recipe for Jellied Fruit Candy Cheese Rolls (often simply called Christmas Candy Cheese Log or Christmas White Fudge) is a beloved classic that brings back waves of childhood nostalgia. The striking contrast of the creamy white base studded with vibrant red and green jewel-like candies makes it the perfect centerpiece for your festive dessert table. 🎅✨
This simple no-bake recipe is a fantastic project for a chilly afternoon and requires minimal ingredients, resulting in a rich, smooth, and slightly tangy sweet treat. It’s fantastic for gifting, cookie exchanges, or simply satisfying your holiday sweet tooth! Let’s get rolling! 🎁😋
🛍️ What You’ll Need: The Essential Ingredients
The beauty of this recipe lies in its simplicity. You only need a few key components to create this festive masterpiece! 👩🍳
Ingredient Quantity Notes & Tips
Cream Cheese (Full Fat) 2 (8 oz) blocks (approx. 450g) Must be softened to room temperature. This is the base!
Confectioners’ Sugar (Powdered Sugar) 4 cups (approx. 480g) Sifted, to ensure a super smooth texture.
Butter (Unsalted) 1/2 cup (1 stick) (approx. 113g) Also softened to room temperature. Adds richness and stability.
Vanilla Extract 1 teaspoon For a classic, comforting flavor.
Mixed Jellied Fruit Candies 1 cup (approx. 150g) The iconic Red & Green Cherry/Lime or Spearmint/Cinnamon fruit slices/gum drops. Cut into smaller pieces if large. 🍒🥝
Optional: Chopped Nuts 1/2 cup Pecans or walnuts add a delightful crunch. (Omit if preferred)
🥣 Step-by-Step: Initial Preparation (The Mixing)
To see the full instructions for this recipe, go to the next page or click the open button (>) and don’t forget to share it with your friends on Facebook.
Preparation is key to a smooth and beautiful roll. Ensure all your dairy ingredients are properly softened! 🧈
Step 1: Soften & Sift
Allow the cream cheese and butter to sit out for at least 1-2 hours until perfectly soft. This prevents lumps!
Sift the confectioners’ sugar into a large bowl. This step is crucial for an ultra-smooth finish. 🌬️
Step 2: Cream the Base
In a large mixing bowl (or using a stand mixer with the paddle attachment), beat the softened cream cheese and butter on medium speed until the mixture is completely light, fluffy, and smooth. Scrape down the sides often! This should take about 3-5 minutes. ⏱️
Step 3: Add Sweetener and Flavor
Gradually add the sifted confectioners’ sugar, one cup at a time, mixing on low speed until fully incorporated. Once all the sugar is in, increase the speed to medium and beat until the mixture is thick, glossy, and holds its shape.
Stir in the vanilla extract. Taste and adjust sweetness if necessary (though 4 cups is usually perfect!). 🥄
Step 4: Fold in the Jewels
Cut your jellied fruit candies into small, uniform pieces. This ensures an even distribution of the beautiful red and green colors throughout the roll.
Gently fold the chopped jellied fruit candies (and chopped nuts, if using) into the cream cheese mixture using a spatula. Be careful not to overmix, as you want the candy pieces to remain distinct and avoid streaking the white mixture. 💚❤️
📄 Page 2: Forming the Rolls & Chilling
📐 The Art of the Roll: Shaping the Logs
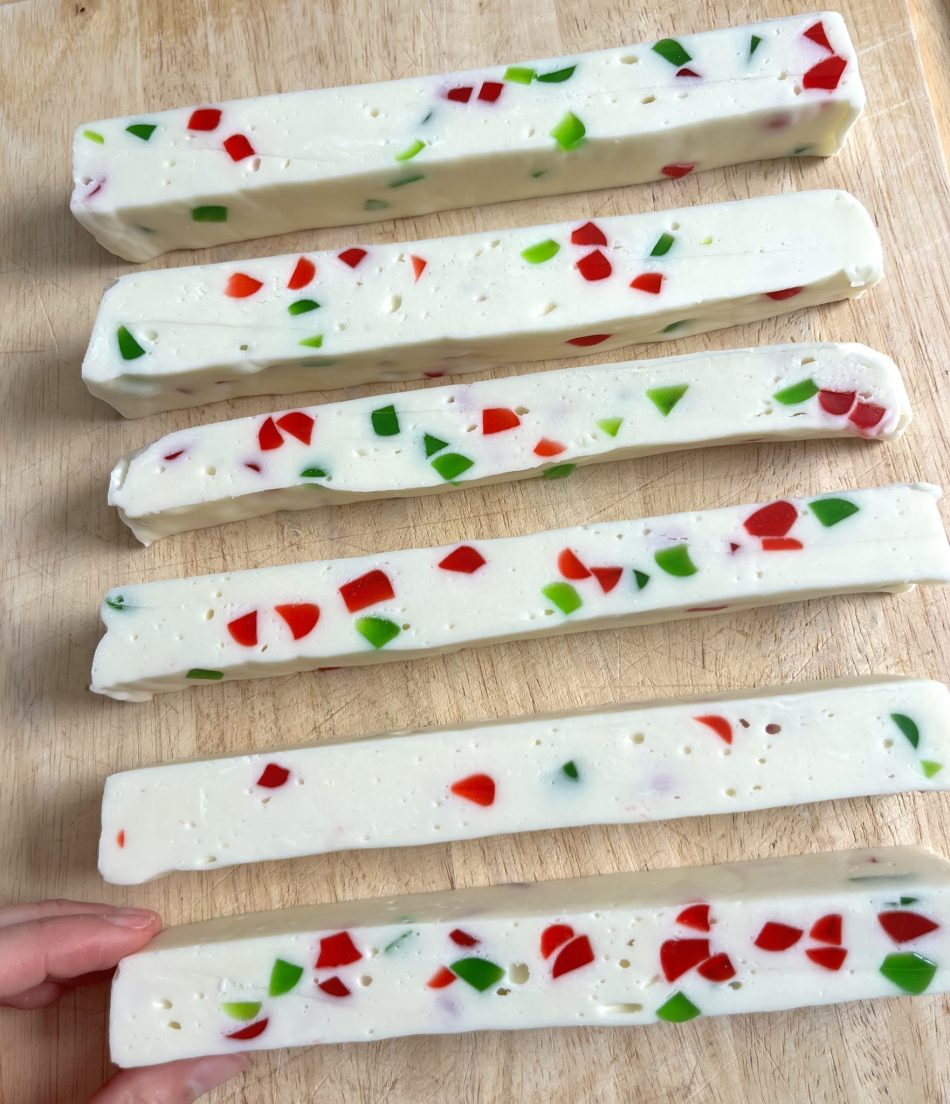
The goal is to create beautiful, uniform logs, as seen in the inspiring image! This method ensures a clean shape and easy storage.
Step 5: Divide and Conquer
Divide the entire mixture into 5 or 6 equal portions, depending on how long and thick you want your final rolls to be (as pictured, 6 uniform logs look beautiful!). 🔪
Step 6: Prepare the Rolling SurfaceLay out a large sheet of plastic wrap (Saran wrap) on your counter. You may need to overlap two sheets for enough length. Alternatively, you can use parchment paper, but plastic wrap gives a smoother finish. 📏
Step 7: Shaping the First Log
Take one portion of the mixture and place it near the edge of the plastic wrap.
Use your spatula to gently shape the mixture into a long, rectangular log shape, roughly 1.5 to 2 inches in thickness. The length will depend on how you divided the mixture.
To see the full instructions for this recipe, go to the next page or click the open button (>) and don’t forget to share it with your friends on Facebook.
Step 8: The Tight Wrap Technique
Gently lift the edge of the plastic wrap and roll the log away from you, completely enclosing the cheese mixture.
Twist the ends of the plastic wrap tightly, like a candy wrapper, to compress the log and create a smooth, firm, and uniform cylindrical shape. This pressure is key! 🌀
If the log is not perfectly smooth, you can gently roll it back and forth on the counter a few times to smooth out any bumps.
Step 9: Repeat and Chill
Repeat Steps 7 and 8 for the remaining portions, creating your full set of festive logs.
Place all the wrapped logs onto a baking sheet or tray.
❄️ The Crucial Chill Time
This step is non-negotiable! The chill time allows the logs to firm up completely, making them easy to slice cleanly and giving the flavors time to meld beautifully. 😋
Place the tray of wrapped logs into the refrigerator.
Chill for a minimum of 4 to 6 hours, but ideally overnight for the best results. The logs should feel very firm to the touch when ready. 🧊
Pro Tip: Speed Chilling
If you are short on time, you can place the logs in the freezer for about 1 to 2 hours. Be careful not to freeze them solid! A partially frozen log is easier to slice perfectly. 🥶
📄 Page 3: Serving, Storage & SEO Keywords
🍽️ Serving Suggestions: Presentation is Everything!
Once your logs are perfectly chilled, it’s time for the grand reveal! 🎀
Step 10: Unwrap and Slice
Just before serving, carefully unwrap each log from the plastic wrap.
Use a sharp, non-serrated knife to slice the log into thick, beautiful rounds or diagonal slices. Wipe the knife between cuts for the cleanest slices, showcasing the stunning red and green jewels! 🔪✨
Serving Ideas
The Log Presentation: Serve the full, unsliced logs on a beautiful wooden board (just like the image!) or a festive platter, allowing guests to admire their beauty before slicing them. 🖼️
As a Dip/Spread: While sliced and firm, this can also be served as a delightful, sweet “cheese ball” alternative. Serve with crisp ginger snaps, vanilla wafers, shortbread cookies, or even fresh fruit like green grapes and strawberries. 🍓🍇
Gifting: Wrap individual slices or smaller logs in cellophane and tie with a festive ribbon for a beautiful homemade food gift! 🎁
💾 Storage and Shelf Life
This is a fantastic make-ahead dessert, perfect for the busy holiday season! 🗓️
Refrigerated Storage: The logs can be stored, tightly wrapped in plastic wrap, in the refrigerator for up to 2 weeks.
Groceries
Freezer Storage: For longer storage, wrap the chilled logs first in plastic wrap and then in a layer of aluminum foil. They can be frozen for up to 3 months. Thaw overnight in the refrigerator before unwrapping and slicing. 🕰️
🛑 Troubleshooting: Common Questions
To see the full instructions for this recipe, go to the next page or click the open button (>) and don’t forget to share it with your friends on Facebook.
“My mix is too sticky/soft!” -> This often means the butter/cream cheese was too soft or you need more powdered sugar. Place the mix in the fridge for 30 minutes to firm up before shaping.
“My slices aren’t clean!” -> Your logs need to be colder. Chill them longer, or try the freezer quick-chill method. Using a thin, sharp, hot (dipped in hot water and dried) knife also helps! 🔥
🔑 SEO Optimized Keywords for Discovery
To ensure this wonderful recipe is easily found by holiday bakers, here are the key search terms (keywords) incorporated and highlighted throughout the recipe:
Christmas Jellied Fruit Candy Cheese Roll
No-Bake Christmas Dessert
Sweet Cream Cheese Log Recipe
Red and Green Candy Log
Homemade Holiday Fudge
Festive Cheese Ball Dessert
Classic Christmas Candy Recipe
Easy Make-Ahead Holiday Treat
Candy Cane Cheese Roll (Alternative Name Suggestion)
Fruit Slice Candy Log
🌟 Enjoy the process of making and sharing this classic, delicious holiday treat! 🌟
To see the full instructions for this recipe, go to the next page or click the open button (>) and don’t forget to share it with your friends on Facebook.
