For the Cake:
- Preheat and Prepare:
Preheat your oven to 350°F (175°C). Grease and flour a 9×13-inch baking pan or line it with parchment paper for easy removal. - Combine Dry Ingredients:
In a medium bowl, whisk together the flour, baking soda, and salt until well combined. - Prepare Chocolate Mixture:
In a separate bowl, combine the hot coffee, unsweetened cocoa powder, and chopped dark chocolate. Stir until the chocolate is melted and the mixture is smooth. - Mix Wet Ingredients:
In a large mixing bowl, whisk together the buttermilk, vegetable oil, softened butter, and brown sugar until smooth and creamy. - Add Eggs:
Add the eggs one at a time, beating well after each addition until fully incorporated. - Combine Batter:
Gradually add the dry ingredients to the wet ingredients, mixing until just combined. Pour in the chocolate mixture and stir until the batter is smooth and uniform. - Bake:
Pour the batter into the prepared baking pan and smooth the top with a spatula. Bake in the preheated oven for 35-40 minutes, or until a toothpick inserted into the center comes out clean. Remove the cake from the oven and let it cool completely in the pan on a wire rack.
For the Frosting:
- Prepare Double Boiler:
Fill a saucepan with a few inches of water and bring it to a simmer over medium heat. Place a heatproof bowl over the saucepan, ensuring that the bottom of the bowl doesn’t touch the water. - Combine Ingredients:
In the heatproof bowl, whisk together the sugar, corn syrup, and egg whites until well combined. - Cook Frosting:
Place the bowl over the simmering water and continue to whisk constantly until the mixture reaches 160°F (71°C) on a candy thermometer and the sugar is dissolved. - Beat Frosting:
Remove the bowl from the heat and transfer the mixture to the bowl of a stand mixer fitted with the whisk attachment. Add the vanilla extract. - Whip Frosting:
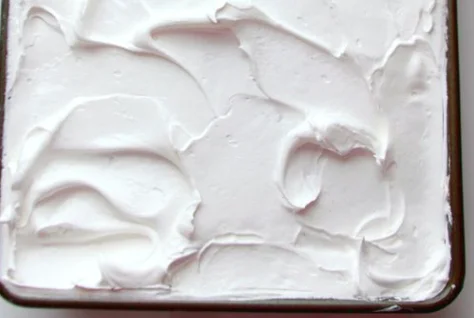
Beat the frosting on high speed until it forms stiff peaks and is glossy and smooth, about 5-7 minutes. - Frost Cake:
Once the cake has cooled completely, spread the frosting evenly over the top using a spatula or knife. - Serve and Enjoy:
Slice the Heaven and Hell Sheet Cake into squares and serve with a sprinkle of cocoa powder or shaved chocolate, if desired.
Cook’s Notes and Variations:
- Enhance Chocolate Flavor: For an extra boost of chocolatey goodness, fold chocolate chips or chopped nuts into the cake batter before baking.
- Coffee Substitute: If you prefer not to use coffee, you can substitute hot water or milk in the cake batter for a milder flavor.
- Make it Gluten-Free: Use a gluten-free flour blend in place of all-purpose flour to make this cake suitable for those with gluten sensitivities.
Frequently Asked Questions (FAQs):
- Q: Can I use instant coffee instead of brewed coffee?
A: Yes, you can dissolve instant coffee granules in hot water to substitute for brewed coffee in this recipe.
- Q: Can I make the cake ahead of time and freeze it?
A: Absolutely! Wrap the cooled cake tightly in plastic wrap and aluminum foil before freezing. Thaw it overnight in the refrigerator before frosting and serving. - Q: Can I use a different type of frosting?
A: While the cloud-like frosting is a classic choice for this cake, you can certainly use your favorite frosting recipe or store-bought frosting if preferred. - Q: Can I make this cake without eggs?
A: Yes, you can try using a commercial egg replacer or a mixture of water, oil, and baking powder as an egg substitute in this recipe. - Q: How should I store leftover cake?
A: Store any leftover cake in an airtight container at room temperature for up to 3 days, or in the refrigerator for up to 1 week.
Keto and Low-Carb Versions:
For those following a keto or low-carb diet, you can make the following substitutions:
- Almond Flour: Replace the all-purpose flour with almond flour for a lower-carb option.
- Sugar Substitute: Use a keto-friendly sweetener